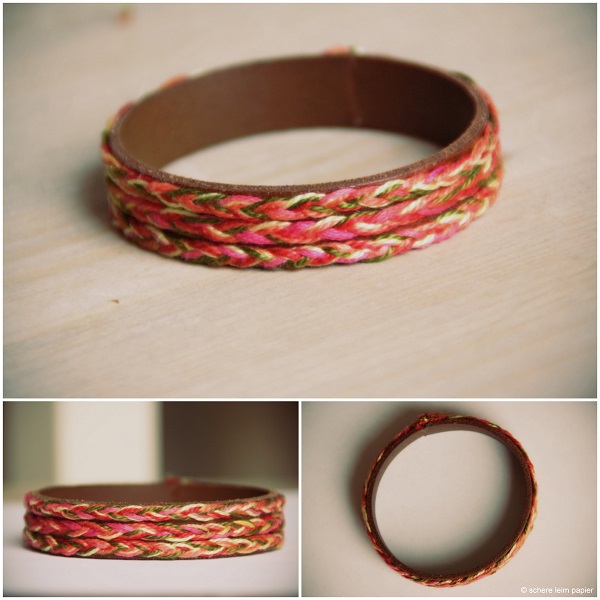
It’s time to craft with schereleimpapier! Monthly, you can find some tutorials here on whaelse.com. And that can’t be denied: fall is coming fast. But winter nears even faster… That’s why I tried to catch the most beautiful thing of autumn and this is the incredible palette of warm and bright colours. The following tutorial for the bangle is very simple and it’s quick to craft. You just have to know how to braid. That’s it.
For more DIY-tutorials visit me here:

You need: some cotton thread in different colours, some universal adhesive, a safety pin and some leather strap. If you don’t want to buy so many different balls of thread, just stop by in an art supplies shop where you can find some crafting sets for friendship bracelets which contain threads in different colours. For the leather strap, you can do some recycling and use a cast-off belt (that’s what I did).
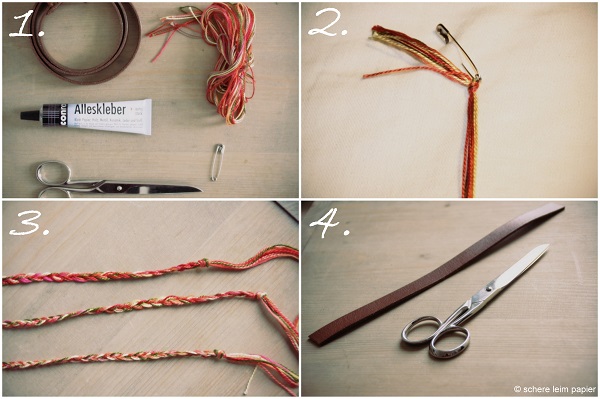
First, braid the threads to some straps. The straps length depends on the necessary diameter for your bangle. For each string you braid with you use multiple threads. The braiding works best if you knot all threads and fix them with the safety pin on a pillow. The number of straps you have to braid depends on the width of your leather strap. Next, cut out the leather strap. Take care of the necessary diameter for the bangle. Now, it’s time for glueing. Don’t forget a support for your desk!
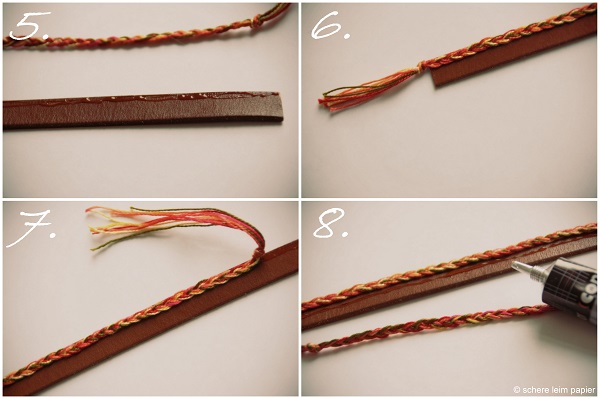
Apply a thin trace of glue onto the leather band and place the first strap. Take care not to stick the knots. I had cut the leather band too long, so I had to take care especially not to stick the knots.
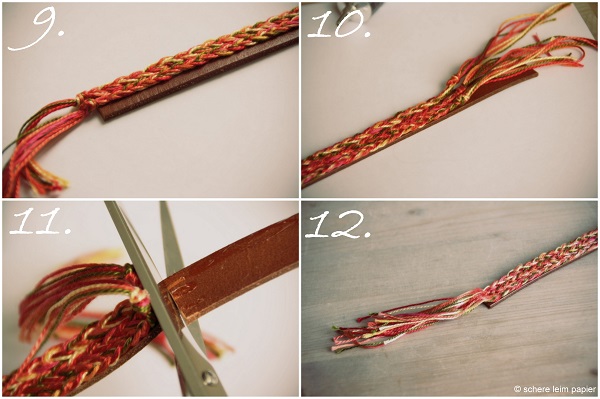
Stick the other strap as well as the first one till the whole leather band is covered. If the length of the straps and the length of the leather band do not fit together, cut the leather band. Next you have to open the knots again.
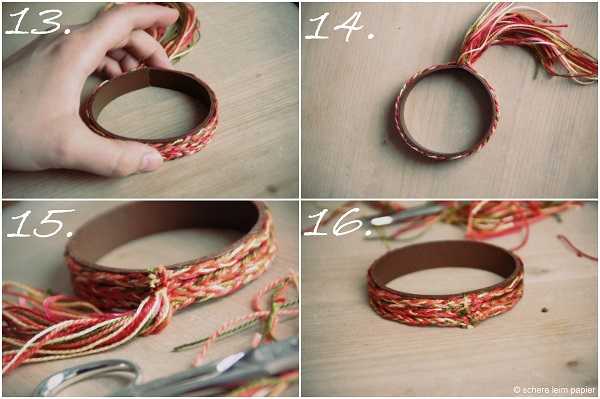
Now, apply some glue onto the cut edges of the leather band and press them together for some minutes. Almost done! Now you can decide if you braid the threads or just knot and cut them. I choosed the plain version.
Finished!


